Saturday, February 28, 2009
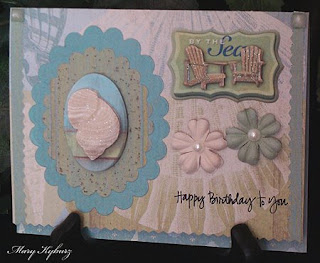
Birthday Card

Yet another birthday!!! Love you, Sis!
This card was made with a stamp by Rosebud Rubber Stamps (of course!)
Labels:
Rosebud Rubber Stamps,
Stampin' Up
Wednesday, February 25, 2009
Wedding/Anniversary


Okay...finally I made a card just for the fun of it. Not anything that I need to stick in the mail today! However, I do have 3 birthdays coming up in the next week, so looks like I'll need to get busy!!!! This card can be used for many different things with just a few changes, like Wedding, Anniversary, Valentine's Day, etc....
I used Basic Gray Bittersweet paper with some blue and tan scraps. I used the spellbinder's scallop and basic circles and the tag. I used Martha Stewart heart border punch, deckle edge scissors, heart eyelets, and 3 rubber stamps -1 Corinthians heart, wedding bells, and "congratulations." I have the verse stamp available for purchase on my etsy store (see link at top of blog). I can get the other stamps if interested. Just send me an email.
Labels:
Rosebud Rubber Stamps,
Spellbinders
Valentine's Card

Okay, this is a little late, but I just finally got around to getting it out of my camera. This card was cased, but I can't remember where I saw it or I would put the link....
Labels:
Rosebud Rubber Stamps
Saturday, February 14, 2009
Valentine Birthday Card
 Some little Valentine bags I made for Adam's preschool class. We filled them with Valentine toys and he got to pass them out during the party at school.
 Saturday, February 7, 2009
My First Explosion Box
 Just some patterned paper (Anna Griffin) with a corner punch, a flourish from Cricut's Home Accents, prima flowers, and a pink pearl crystal sticker.
My FIRST EXPLOSION BOX!!! Okay...this only took me SEVERAL days to finish. I just kept adding and adding and adding....Not bad for a non-scrapper, and a rustly old card maker (if I do say so myself.) I hope my Mom likes it. It's for Valentine's Day, and it's from me and the grandkids. I guess I'll have to make my Dad a card too. (Maybe something a little more simple, or it might be Father's Day before it's ready.)
Here is a link to the website that has the pattern: http://www.scrapbook-crazy.com/explosion-box-album.html
TOP LAYER OF EXPLOSION BOX:
I thought this layer was going to be boring, with just photos, but it turned out to be my favorite!! I used a sizzix die cut for the tag with the window. I embossed "I love you" on the window flap with cuttlebug embossing folder, added a heart brad, the end of a flourish stamp, and raspberry paper behind it. The center is stamped and embossed with "Happy Valentine's Day" by Inkadinkado, and I added some country heart buttons.
MIDDLE LAYER OF THE EXPLOSION BOX:
BOTTOM LAYER OF THE EXPLOSION BOX
TOP LAYER OF EXPLOSION BOX:
The roses are on the backside of the flaps (I used cricut's wild card)
I thought this layer was going to be boring, with just photos, but it turned out to be my favorite!! I used a sizzix die cut for the tag with the window. I embossed "I love you" on the window flap with cuttlebug embossing folder, added a heart brad, the end of a flourish stamp, and raspberry paper behind it. The center is stamped and embossed with "Happy Valentine's Day" by Inkadinkado, and I added some country heart buttons.
MIDDLE LAYER OF THE EXPLOSION BOX:
This flower is on the backside of each flap.
On the middle layer I stamped the heart on raspberry colored paper and cut out each one (yes, I cut out all four.....) then each child, and myself wrote a note to Mom (or Oma). Jonah got to stamp his note, since he is only 2 yrs old.
BOTTOM LAYER OF THE EXPLOSION BOX
Here is the bottom layer of the card. I used various stickers (Basic Gray Bittersweet), spellbinder scalloped square cutouts, heart brads, prima flowers, cricut tags and hearts, crystal stickers, and other misc. stuff. One flap has a pocket with a tag you can pull out (says "I love you")
Labels:
cricut,
Explosion Box,
sizzix,
Spellbinders,
tutorial
My first Glass Block Light


My first attempt at a glass block light. This one if for my Dad. He is a Lutheran Minister (retired -sort of)...and he likes Martin Luther's seal. I hope he likes this version. The artwork is a little like stained glass. I don't really like the way the ice texture on the glass block shows through. I think I'll need to get the clear glass next time. Also, the lights all sit at the bottom. Not sure how to fix that unless I just need more lights. It's a 20 light strand. The artwork was printed on vellum, and then laminated, and stuck on with a large sheet of double sided adhesive. I tried my "bowdabra" for the bow. I'll have to practice a little!!
Labels:
Glass Block Lights
Friday, February 6, 2009
Subscribe to:
Comments (Atom)


